

COMPLETE GUIDE PROJECTQ · 9 STAGES
Install English localization from scratch
The whole process on one page: request, projector registration, compatibility check, payment, installation and initial ProjectQ TV setup. Your projector stays at home. No computer or HDMI connection is needed; you may need a USB drive to transfer the APK to the projector.
PROJECTQ · HOW IT WORKS
A system for your needs- 01Your device↓
- 02Model-specific adaptation↓
- 03ProjectQ
Follow your current stage. If the wizard’s model-specific instructions differ, follow your exact installation and contact support.
Prepare your projector, phone and internet connection
Turn on the projector and connect it to your home internet. Check that a normal app or web page opens: connecting to Wi-Fi alone does not prove internet access.
We recommend a factory reset before installation.
For the most stable result, we recommend installing the system on a clean projector after a factory reset. If you have not made substantial modifications to the device, you can try without resetting, but installation may not complete correctly. A factory reset deletes local data and settings: save important files, your personal link and app sign-in details beforehand.
Have a phone with a camera and browser ready. You’ll use it to submit your request, open your personal link and confirm the device. If your projector installs APK from USB, you’ll need a storage device and its built-in file manager. No cable to a computer is needed.
Record the exact model name from the case or About screen, including Pro, Ultra, Max and other suffixes. Variants in the same series may need different adaptations. Do not install firmware for another model. Factory reset recommendations are explained above.
Submit a request and save your personal link
Open the form on your phone. Enter the model and your phone number, review the consents and submit the request. You may add your name for easier communication. Selecting a model in the form does not replace checking the actual device.
After submitting the request, save your personal link in your phone’s bookmarks or elsewhere outside the projector. It gives access to the request, status and files, including after a projector reset. Do not share it in public chats.
Your phone number is used to contact you and find your request. Access is not automatically restored if you lose the link; contact technical support.
Open a English localization request
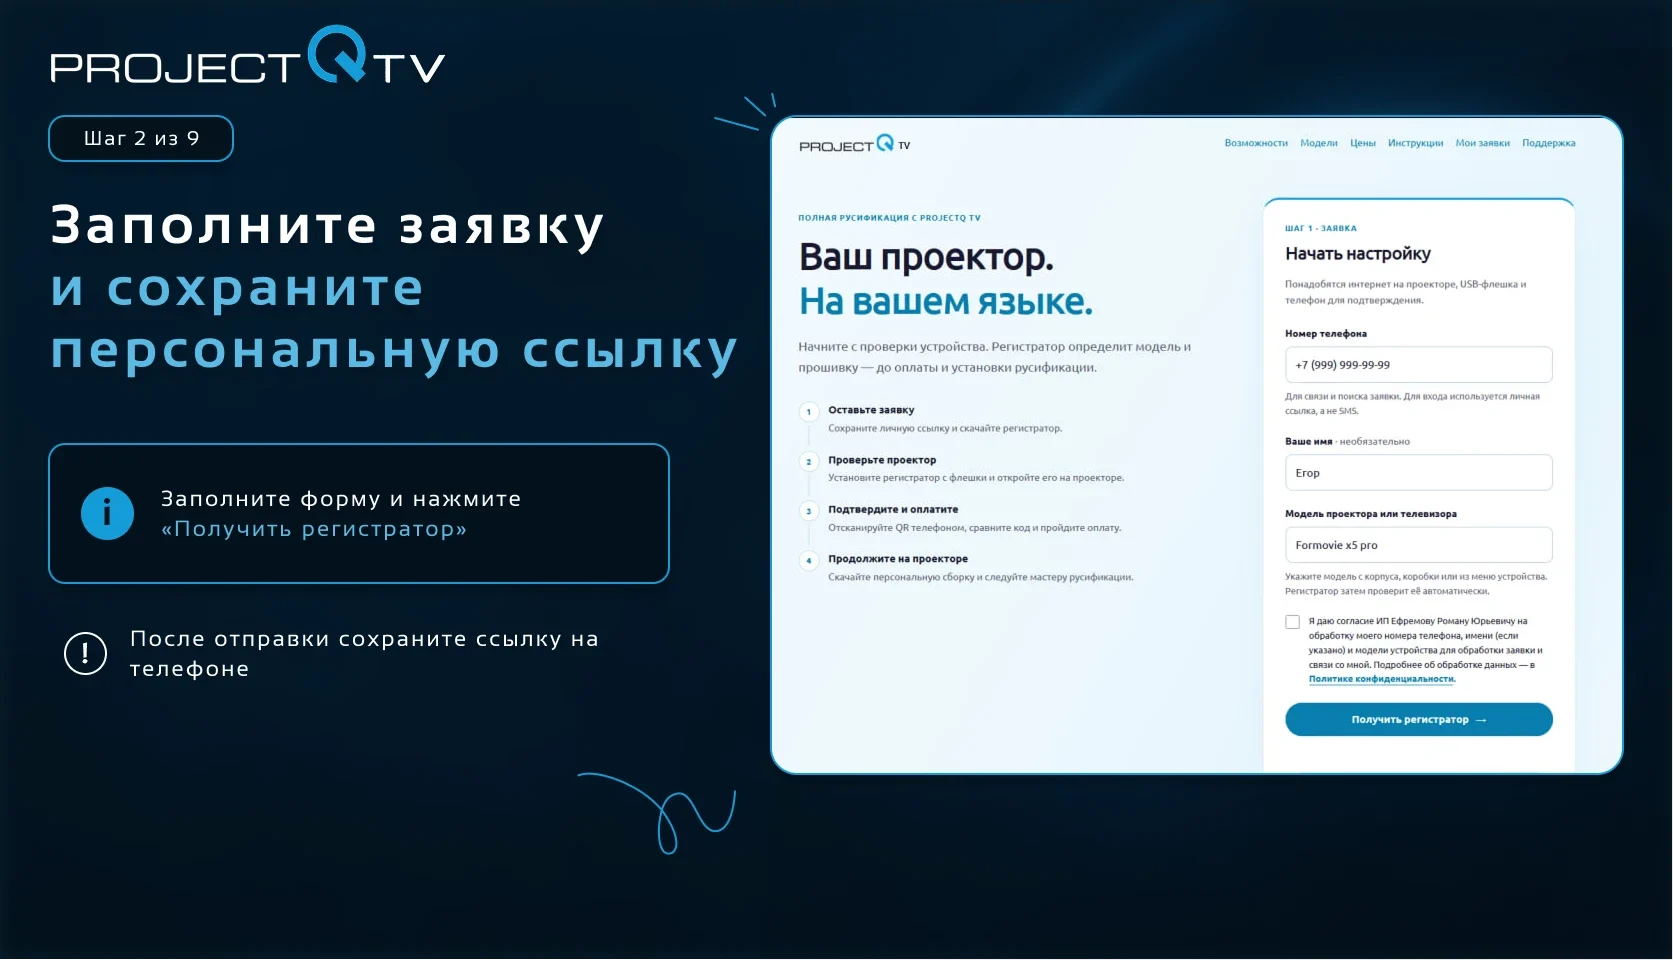
Your request is created and the personal link is saved on your phone.
Download the registration app and open it on the projector
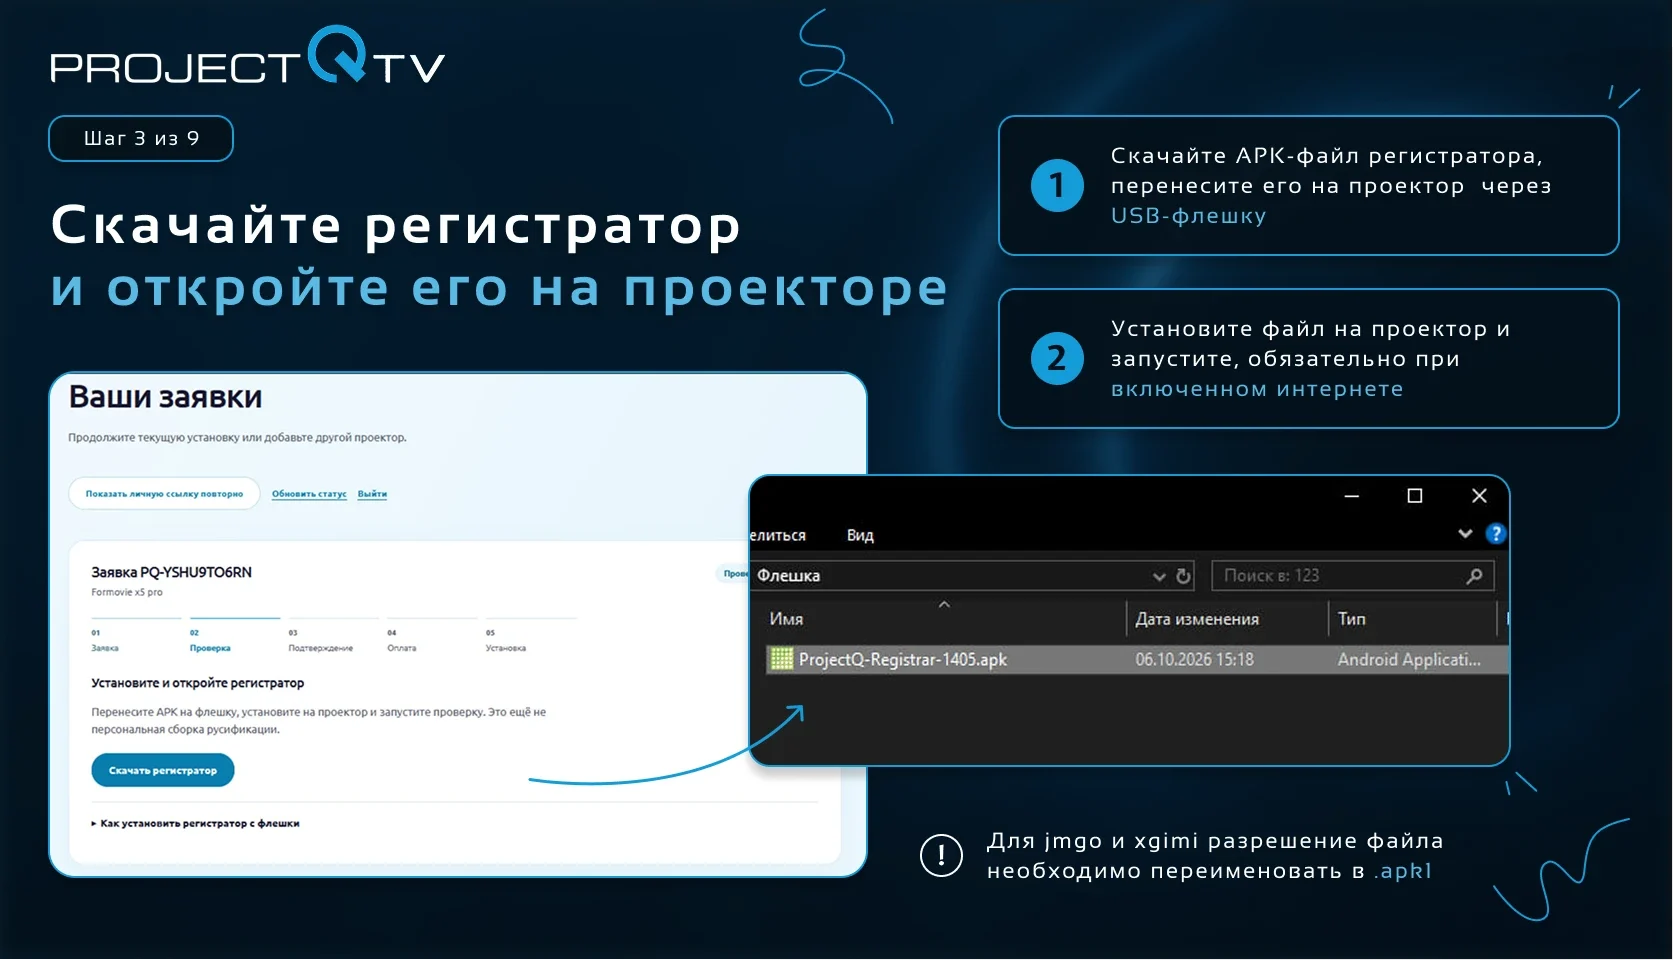
On your request page, download the recommended registration app: a APK file for the device’s initial connection. Use the file from your own request, not one forwarded from someone else’s conversation.
For a transfer via USB, save APK to the storage device, connect it to the projector and open the file in its built-in file manager. If prompted to allow installation from this source, grant permission to that file manager and return to the file. Menu names vary by model.
Install the app and open it on the projector itself. The projector needs internet throughout registration. Installing the registration app on your phone does not register the projector.
If the file is not visible, check that the download is complete and its name ends in .apk. If the system blocks installation, save the message and contact support; do not change unfamiliar service settings.
! For models jmgo and xgimi Rename the apk file extension to .apk1.
Example: “ProjectQ-Registrar-1405.apk1”
Confirm your specific projector
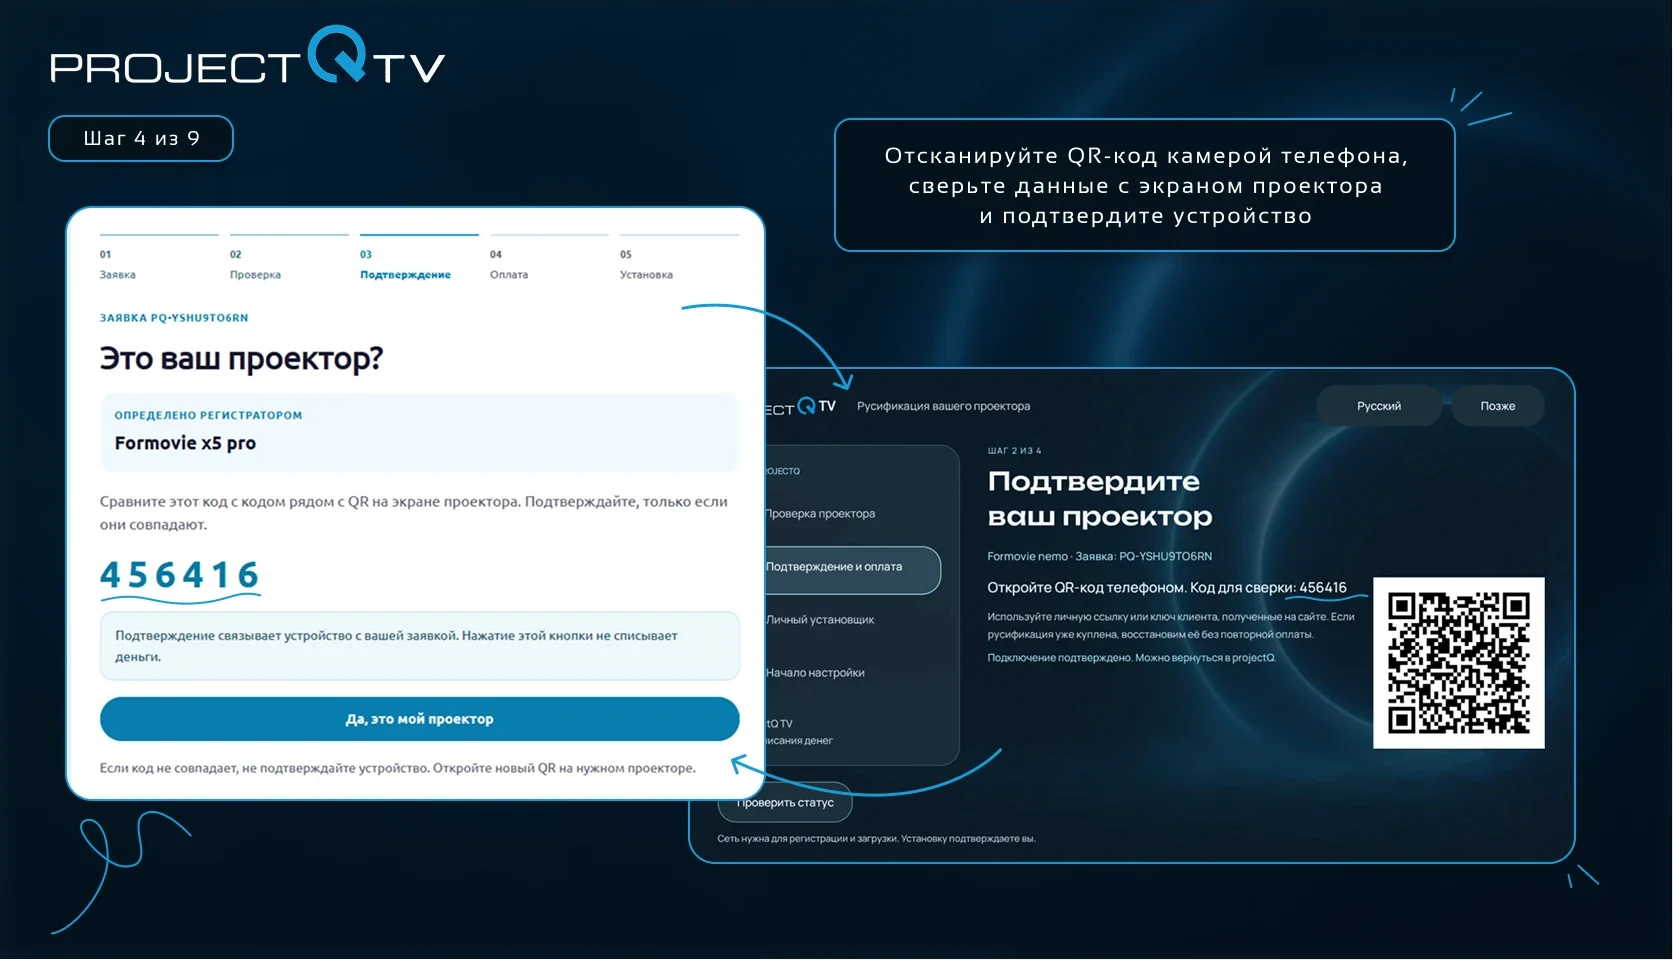
The registration app displays a QR code or another way to confirm. Scan QR with your phone’s camera and open the suggested page.
Compare the code and details on your phone with the projector screen. Confirm only your own device. If the model or code does not match, stop and send support the error details.
Wait for compatibility checks and assignment of a suitable version. For an unknown model, the team first checks parameters and installation options. A universal build may work on other devices, but similar names do not guarantee compatibility.
If the device is identified incorrectly, do not select a nearby model just to continue. Support will help confirm the exact variant.
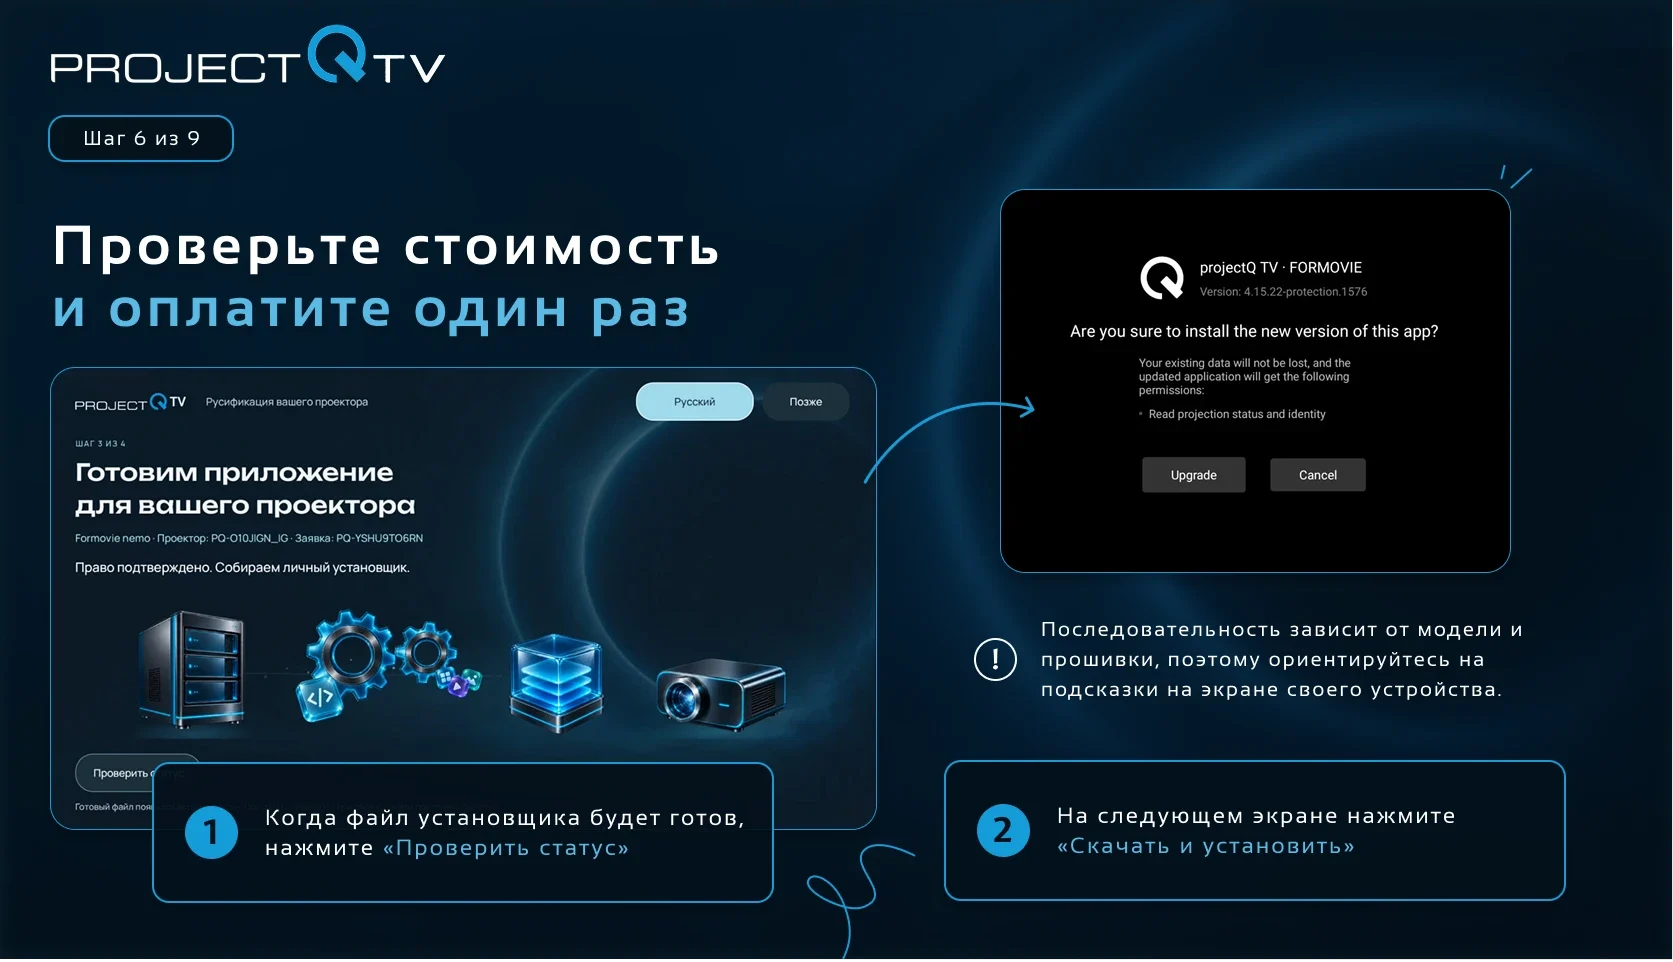
Check the price and pay once
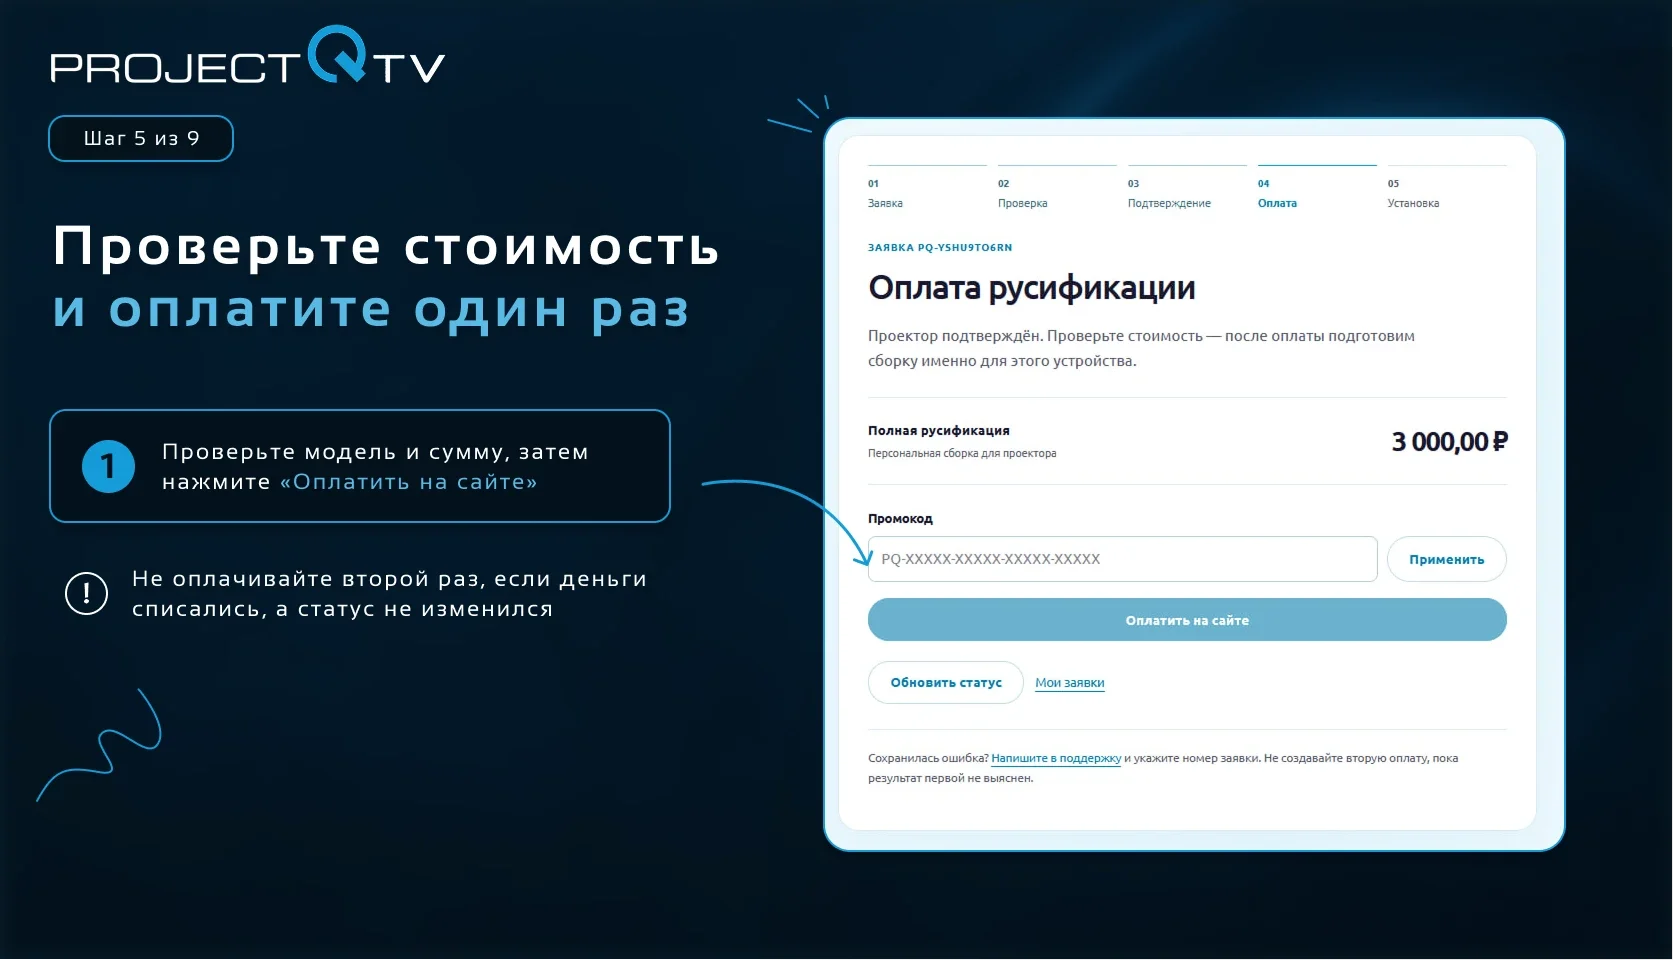
Check the model, service scope and final amount in your request. Prices depend on the model; current rates are published on the site. Pay after compatibility confirmation, when the payment button becomes available.
Payment opens in a payment form on this site. You are buying the ProjectQ TV adaptation for the confirmed projector. Third-party streaming subscriptions and paid apps are purchased separately.
After a successful payment, wait for your request status to update. Do not pay twice if the money was charged but the status has not changed. Check the page again and, if needed, send support your receipt and request number.
Keep the receipt outside the projector. Free reinstallation after a reset applies to the right purchased for this device; moving it to another projector requires a separate agreement.
Get the installer and start the wizard
The installer is provided within 10 minutes of compatibility and payment confirmation. Follow the status in your request and registration app. Use the file and launch method offered by your personal installation flow.
Registration and installation are separate stages. The first links the device to your request; the second installs the system. Do not run an old file for another model. If your personal page asks you to transfer APK via USB, repeat the transfer method used for the registration app.
Open the installer on the projector and follow the wizard. Grant the permissions it requests for installation and system operation. The sequence depends on model and firmware, so follow the prompts shown on your device.
Keep the internet connection and power on during installation. Do not turn off the projector or close the wizard before it reports a result. If interrupted, record the last screen and use the safe continuation offered by the wizard or support.
Choose a language and check startup
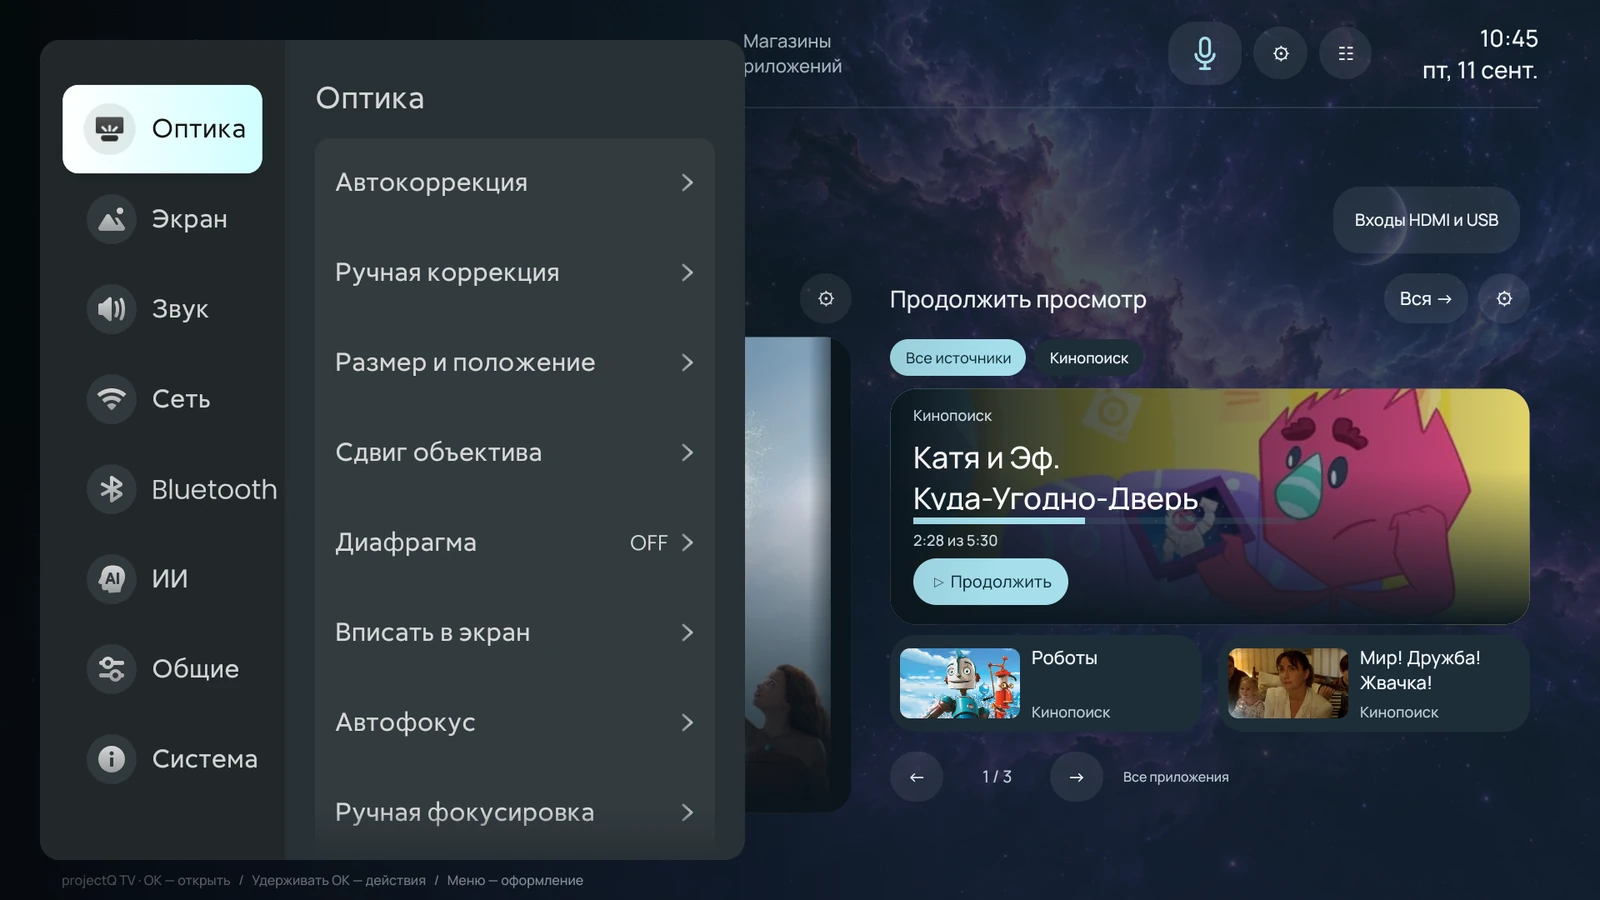
Choose your language in the ProjectQ wizard or settings. This changes the launcher and supported system sections; English localization includes the projector settings available in your model’s adaptation. Third-party apps may have their own language choices.
If the wizard asks you to choose a home screen, select ProjectQ as instructed. Press Home on the remote and check that the new interface opens. If a restart is needed, do it after installation finishes.
Check remote navigation, sound, internet access and opening the projector settings. Available system options depend on your model; do not look for a feature the device itself does not have.
System localization into English
Set up viewing, appearance and voice features
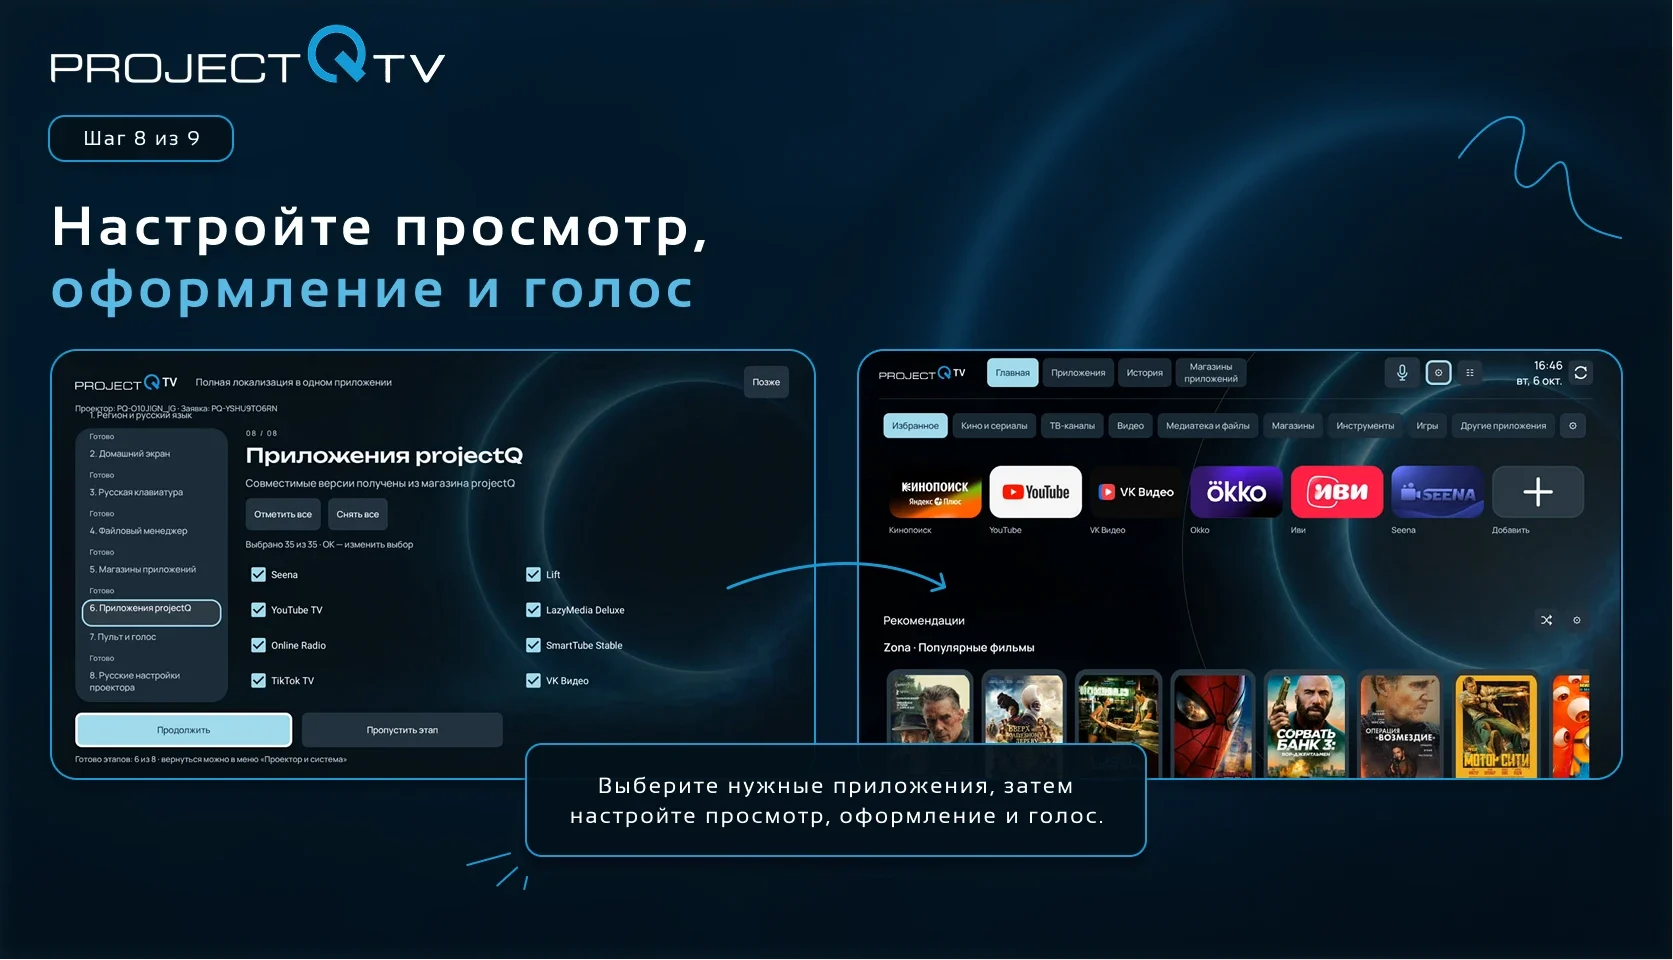
Open the ProjectQ app store and install the apps you need. They receive the required operating permissions within the model adaptation. Sign in to your service accounts; subscriptions and regional availability are set by those services.
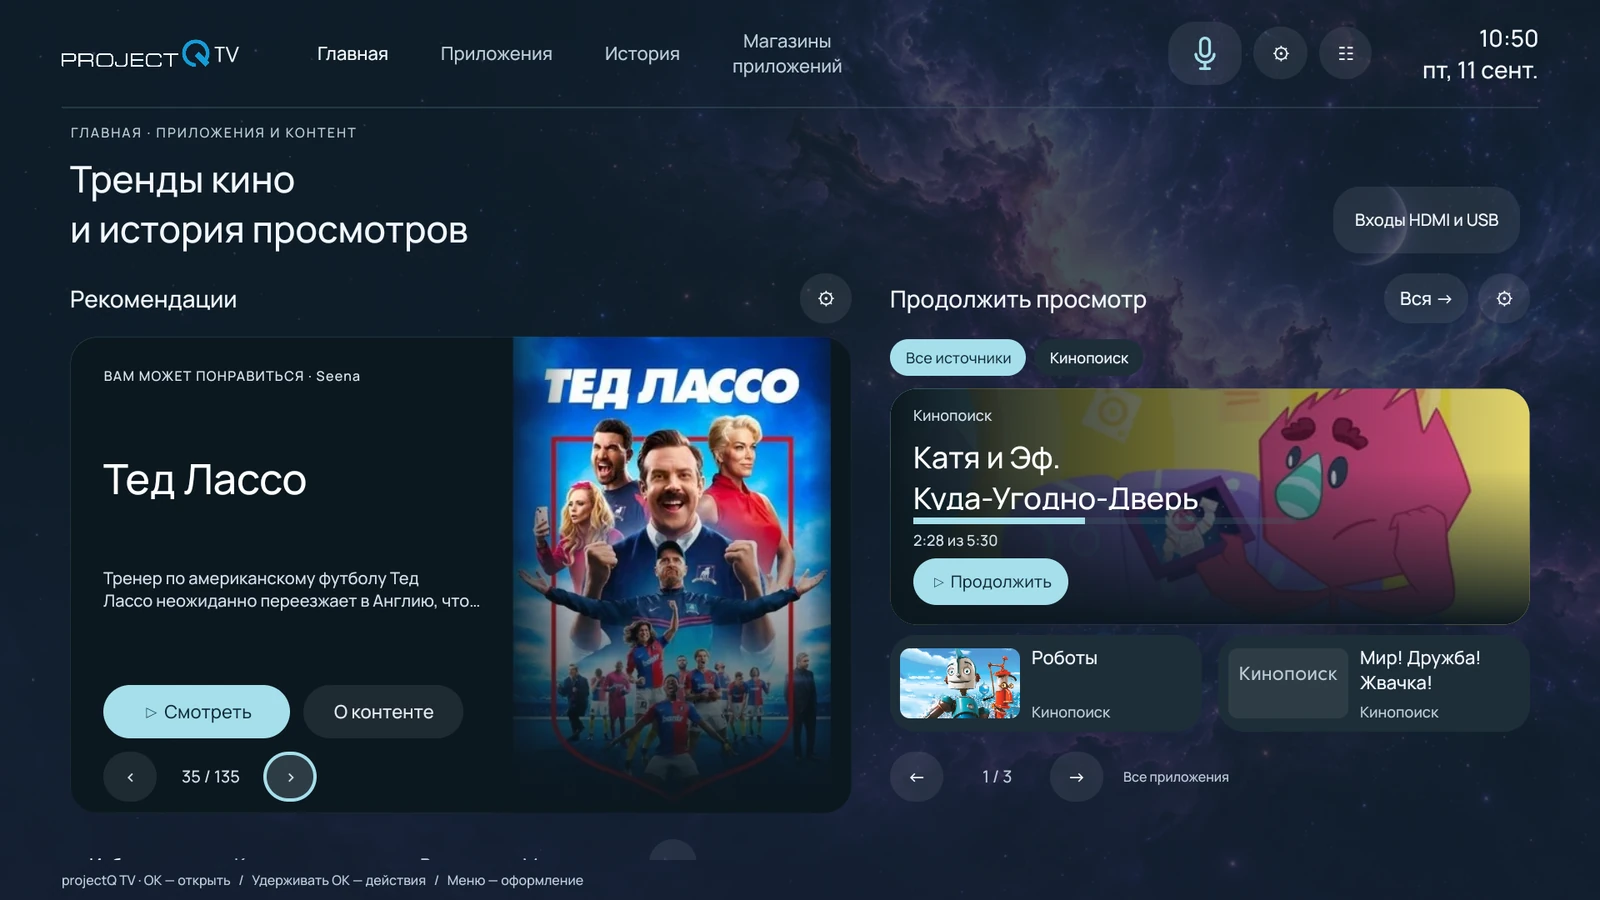
Supported apps offer viewing history, recommendations and Continue watching. An empty history on first launch is normal: sign in and start watching first. See System features for the available integrations.
In appearance settings, choose the interface style, colors, background, tile sizes and section order. Save the appearance profile and a copy outside the projector if you want to restore it after a reset. Set family profiles, the screensaver and app behavior to suit your usage.
For the ProjectQ voice assistant, choose an available recognition method and give the necessary consents. Online modes need a network connection; smart home control through Yandex needs a linked account and compatible devices. Try a simple request on the assistant screen.
Keep your access for updates and recovery
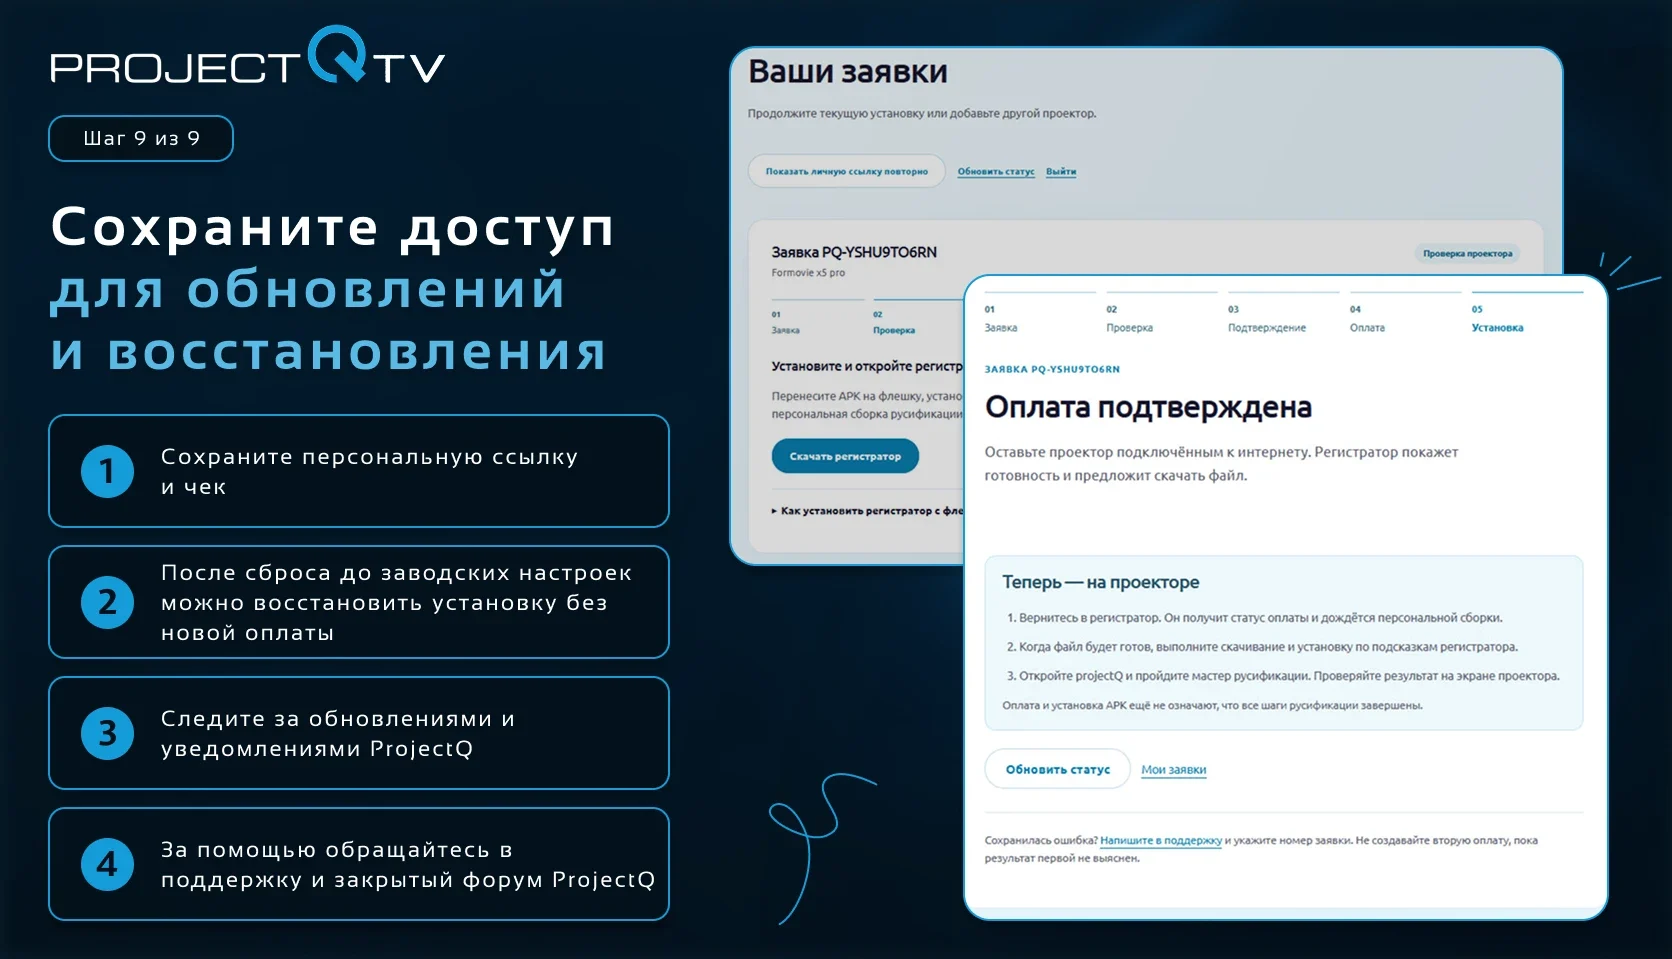
Keep your personal link and receipt on your phone. Back up important app data using each app’s own tools: a factory reset deletes local accounts and settings.
Your purchased service includes ProjectQ updates and reinstallation on your device after a reset, without another payment. Follow system notifications and on-screen update instructions. Updating the manufacturer’s factory firmware is separate; check compatibility in advance.
Ask for an invitation to the private ProjectQ forum, available to our projector buyers and English localization customers. Discuss everyday use and find useful materials there. Send individual request and payment questions to support.
DONE
Expected result
ProjectQ TV opens from the remote, the language and settings are understandable, and your apps are installed. You paid once and kept access to updates and free recovery on this projector.
If it didn’t work
If a stage does not finish, save the error message and request number. Do not make another paid request or reset the device to fix a download error. The Troubleshooting and support guide has checks for each stage.
Frequently asked questions
Do I need to bring you my projector or connect it to a computer?
No. You submit a request and install the software at home on the projector itself. You need internet access, a USB flash drive and a phone. You can prepare the drive from a phone if it supports USB storage and you have a suitable adapter. There is no need to connect the projector to a computer with a cable.
GuidesWhat should I prepare before installation?
Have internet access on the projector, its original remote, a USB flash drive and a phone for device confirmation. Check the full model name on the housing or box. Save your personal request link: you will need it to continue the setup and for recovery.
GuidesWhy install the registration app first?
It identifies your device and software version so the team can confirm a suitable adaptation before payment. The registration app and the full ProjectQ system are separate installation stages.
GuidesWhat am I paying for, and is there a monthly fee?
You pay once for the ProjectQ adaptation for your projector. Free reinstallation after a reset on the same device and future updates are included. Subscriptions to streaming platforms and other third-party services are paid separately.
GuidesCan I install my purchased version on another projector?
The purchase and free recovery apply to the projector for which the adaptation was ordered. Another device needs its own model check and request.
GuidesMy projector isn’t in the catalog. Could ProjectQ work with it?
Yes, compatibility goes beyond the catalog. The universal base may suit other devices too. Submit a request: the registration app identifies the device parameters, and the team confirms available features before payment. A suitable base does not yet mean every system menu has been translated.
GuidesWhy do similar models have different features?
Models and firmware versions differ in menus, remotes, voice input, source selection and app installation. We adapt each version to those differences. Always include the full Pro, Ultra and Max model names.
GuidesDo I need to configure every app permission manually?
The wizard prepares your selected compatible apps and the necessary permissions. It prompts you when confirmation is needed. This helps apps work correctly; you can see each step’s result in the wizard.
GuidesI lost my personal link. Do I need to buy again?
First, use access recovery on the request page or contact support with your purchase details. Losing your link alone is not a reason to make another paid purchase.
GuidesHow long does installation take, and can I do it myself?
The process is designed for self-installation: follow the prompts on your phone and projector. Duration depends on the connection, downloads and model. The guide and videos follow the wizard’s stages; support can help if a step does not finish.
GuidesHow much does English projector localization cost?
ProjectQ localization starts at 3 000 ₽ per projector. The price depends on the exact model and firmware; current prices are listed in the catalog and on the Prices page. We confirm compatibility, translation scope and the final price before payment. There is no monthly fee for ProjectQ; third-party subscriptions are paid separately.
GuidesHow soon will I get the installer after payment?
Within 10 minutes of compatibility and payment confirmation. The installer is provided in your account. If it does not appear, refresh your request status and contact support with its number; do not pay again.
GuidesHow does ProjectQ localization differ from installing English firmware?
People searching for “English projector firmware” often need understandable menus and settings. This is possible without replacing the factory system image: ProjectQ adds translation and our own system to the original OS. Third-party firmware replaces system software and must match the model, hardware revision and version exactly; an unsuitable image can disrupt the device. Compatible official manufacturer firmware is different from an unknown forum build.
GuidesVideo for this guide
This guide contains the full procedure. A demonstration video will also be available here.
VK VideoYouTube